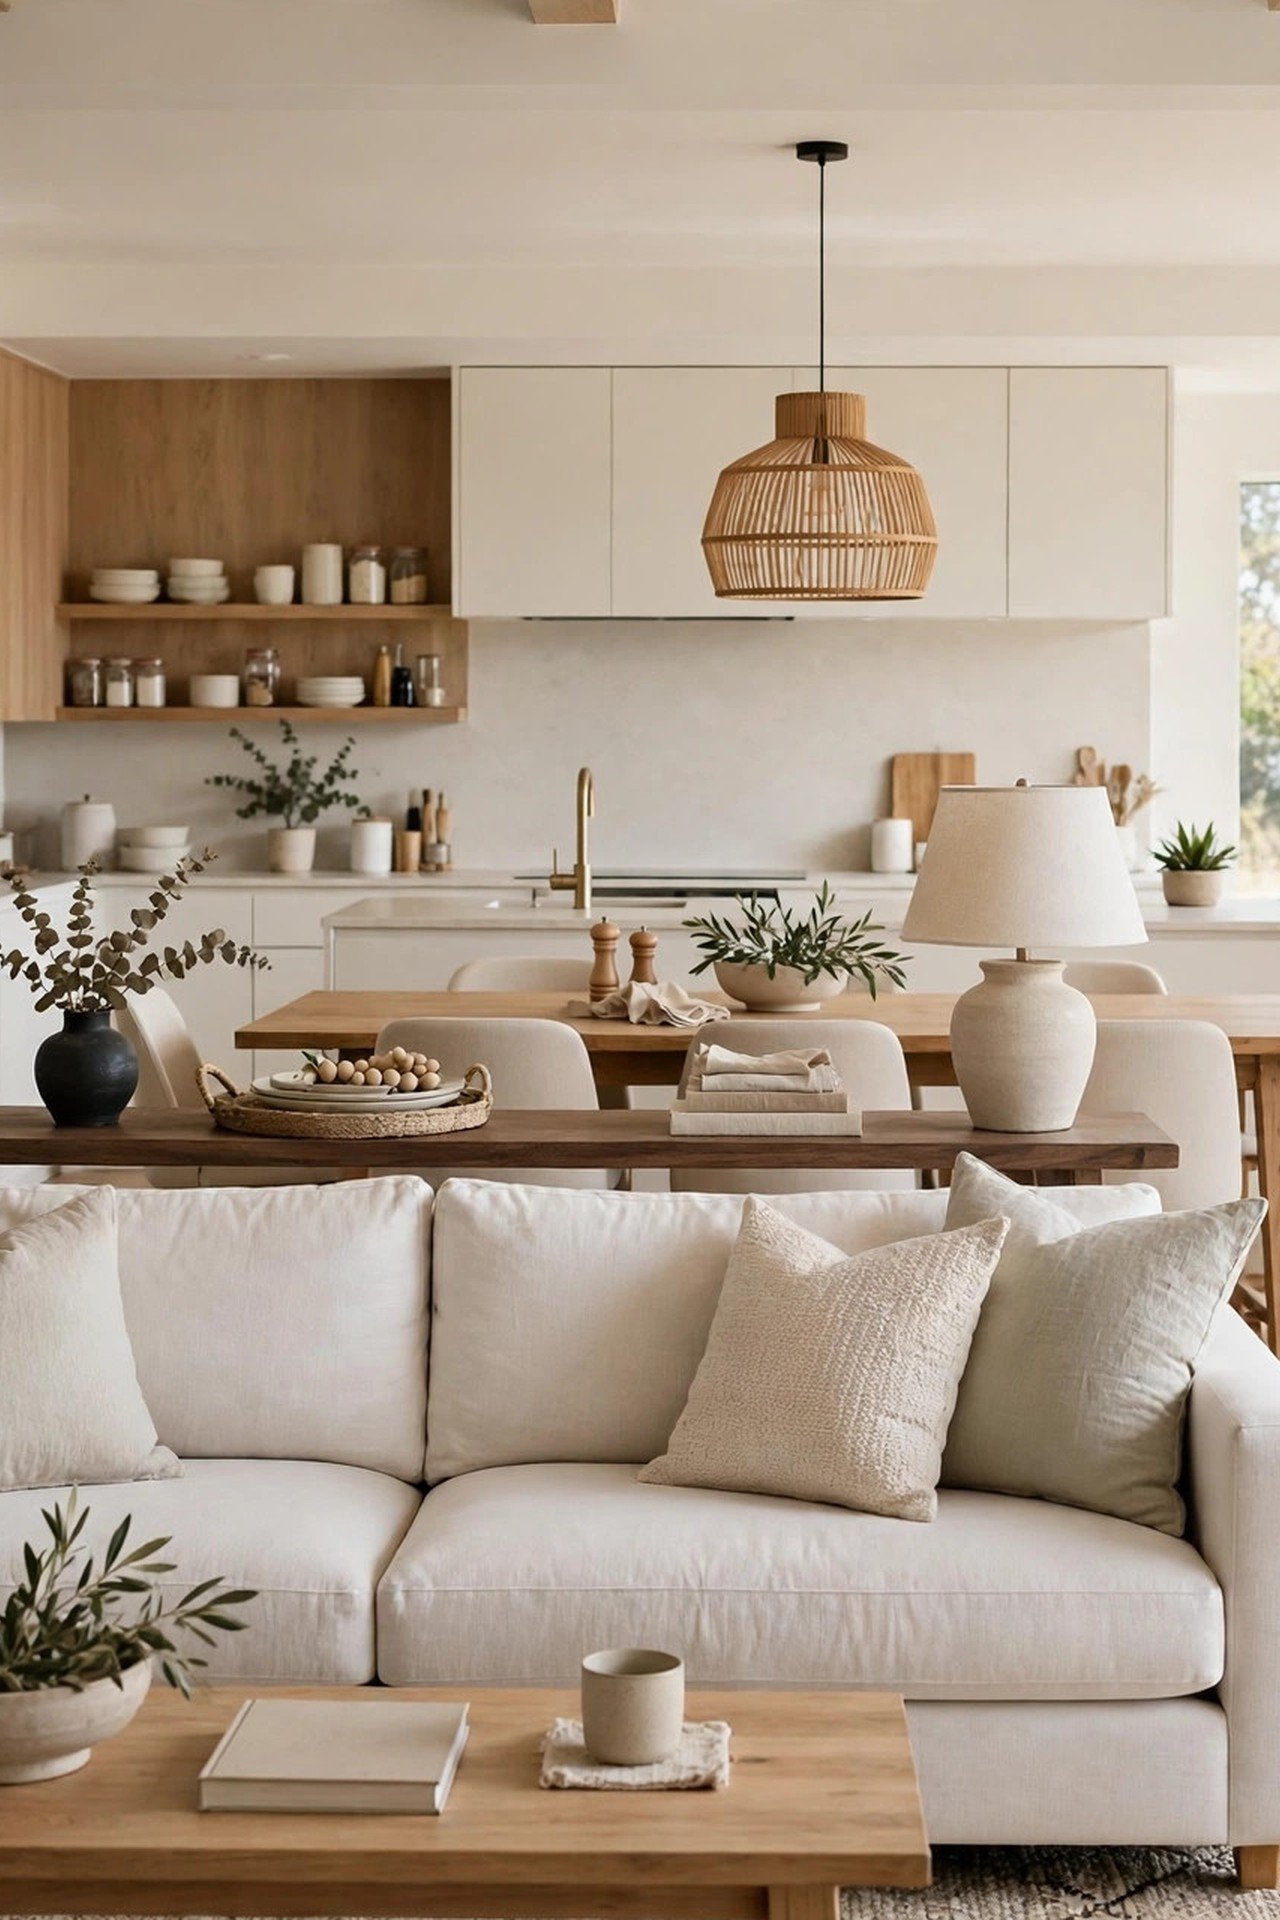
Open-plan living was supposed to feel airy and modern. Instead, many open-plan rooms feel like a warehouse with furniture in it: the sofa drifts somewhere in the middle distance, the dining table bleeds into the TV area, toys and laptops colonise every surface, and nothing looks finished because nothing has an edge. Guests walk in and cannot tell where one activity ends and another begins — and neither can the people who live there.
The problem is not openness. It is the absence of zones. In a house with separate rooms, walls tell you where living, eating and working happen; in an open plan, you have to say it with furniture, rugs and light instead. This guide shows how to define clear, calm zones in an open-plan living room — no building, no screens wall to wall, just deliberate edges.
Quick Answer
To define zones in an open-plan living room, give each activity its own territory and mark it three ways: a rug or floor change under it, the back of a piece of furniture as its border, and its own pool of light. Place the living zone around the focal point, the dining zone nearest the kitchen, and any work corner in the quietest spot. Keep one clear walkway of about 90 cm running between the zones rather than through them, store each zone’s clutter inside its own border, and limit the plan to two or three zones — more than that reads as a showroom, not a home.

Step 1: Decide the Zones and Their Order Before Moving Anything
Start with the fixed points, because they place the zones for you. The kitchen end naturally claims dining — food should travel metres, not across the whole plan. The room’s focal point — a fireplace, the best window, the TV wall — claims the main living zone. The quietest corner, furthest from both, is where a desk or a reading chair belongs. What is left in the middle becomes circulation, and it should stay that way.
Sketch the plan as rectangles before touching furniture. Most open-plan rooms support two or three zones comfortably; four almost always fails, because each zone shrinks below the size where it can hold its own furniture group. This is the same zoning method that makes one-room flats work, applied at the generous end of the scale — the approach in our guide to a studio layout that creates separate living zones transfers directly, because an open-plan room and a studio have the same problem: one space, several lives.
Step 2: Mark Each Zone’s Floor — Rugs Are the Walls You Can See
A zone becomes real the moment its floor is marked. The living zone gets a rug sized to its seating — front legs of every seat on it, as a minimum — and the dining zone can get its own rug if the table area is generous, or simply the table and chairs grouped tightly on the bare floor as a distinct island. Where hard flooring runs throughout, the contrast between rug and bare floor does the dividing work that a wall would do.
Keep the gaps between zones honest: 60–90 cm of clear floor between one zone’s border and the next tells the eye “different place” far better than furniture lined up edge to edge. And keep main walkways on bare floor — a rug edge sitting in the traffic line curls, trips and blurs the very border you are trying to draw. If your living zone’s rug currently floats in front of the sofa touching nothing, fix that first with the sizing rules in our guide to choosing the right rug size for your seating, because a badly sized rug is the single most common reason a zone fails to read.
Step 3: Build Soft Borders With Furniture Backs and Low Pieces
Zones need edges on the vertical plane too, but low ones. The classic border is the back of the sofa: float the sofa so its back faces the dining area or the entry, and the living zone instantly has a wall that does not block light or air. A slim console table or low open bookshelf behind the sofa finishes that border and earns its keep with lamps and storage on both sides.
Other borders that work: an open-backed shelf unit between living and work zones, a pair of armchairs with their backs to the next zone, a change in flooring level or material, or a row of tall plants in the gap. Keep every border at or below about chest height and partially open — the goal is to suggest rooms, not to rebuild the walls the plan removed. Whether your sofa can float at all depends on the depth behind it — you need a genuine walkway or a useful border strip behind it, not a dead gap — so measure that depth honestly before you commit.
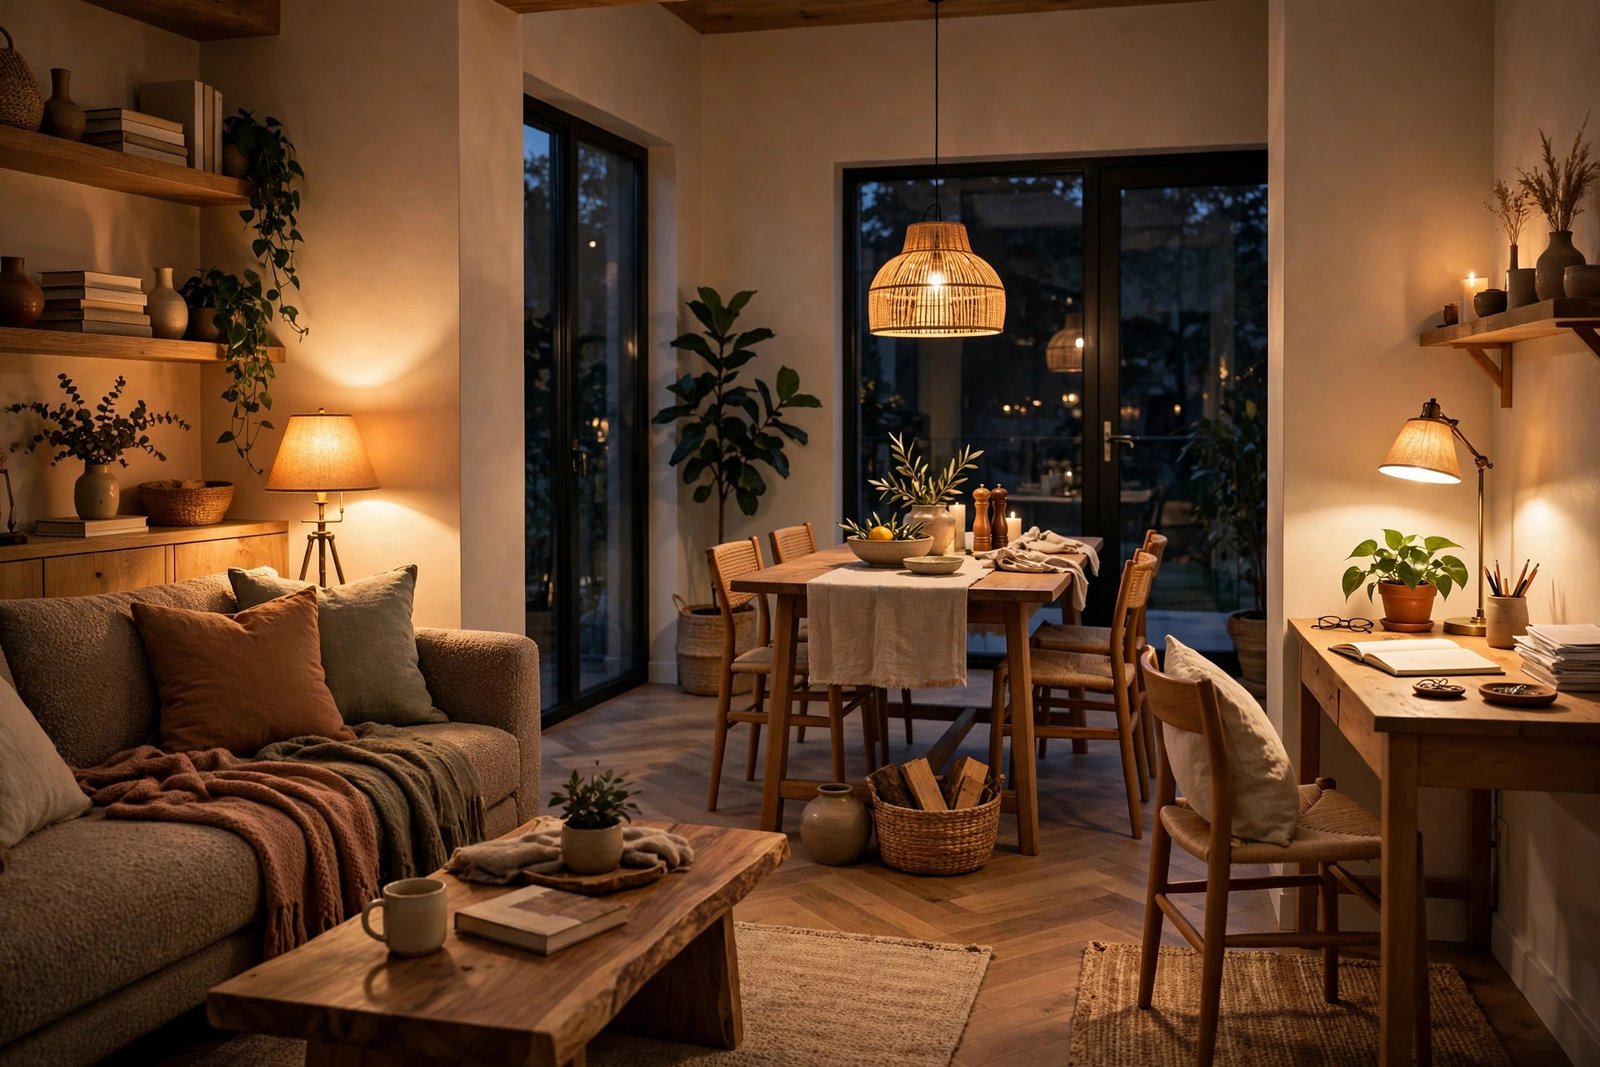
Step 4: Give Every Zone Its Own Light
Light is the zone signal people feel without noticing. One central ceiling light for the whole plan flattens everything into a single bright warehouse; separate pools of light tell the brain there are several places here. Give the living zone lamps at seated height, the dining zone a pendant or a defined light above the table, and the work corner a focused task lamp. In the evening this layering does more zoning work than any furniture move — each lit island reads as a room, and the dim gaps between them read as the corridors.
During the day, protect the natural version of the same effect: keep tall borders and bookcases off the window wall, so daylight reaches across the zones instead of stopping at the first one. A dark far zone will always look like storage, no matter how well it is furnished.
Step 5: Contain Each Zone’s Clutter Inside Its Own Border
Open plans look messy for one final reason: with no walls, every zone’s stuff migrates. The fix is assigning storage the same way you assigned floor space. Work clutter lives in the work zone, in a lidded box or drawer at the desk. Toys live in one basket at the edge of the living zone. Dining surfaces clear back to the kitchen side. Each zone gets exactly the storage its activity needs, placed at the zone’s edge, so tidying means returning things a few steps — not a tour of the whole plan.
Be strict about orphans: the chair that belongs to no zone, the side table parked between two zones “for now”. Unzoned furniture reads as mess even when the room is clean, because the eye cannot file it anywhere. If a piece serves no zone, it leaves — the removal logic in our guide to a small living room with too much furniture applies zone by zone in an open plan too.
Mistakes to Avoid
- Lining all the furniture around the outer walls. It leaves a dead, echoing middle and no zone at all. Open plans are zoned from the inside out, with groups, not from the walls in.
- Too many zones. Four or five chopped-up territories in one plan reads as a furniture showroom. Two or three generous zones feel like a home.
- Borders that block light and air. Full-height solid units rebuild the walls you removed and darken the far zones. Keep borders low, open-backed or made of furniture backs.
- Walkways running through zones. A path across the seating group makes seated people feel like they are sitting in a corridor. Route circulation between zones, at about 90 cm wide.
- One ceiling light for the whole plan. It flattens every zone into one bright space. Separate light pools per zone are what make the zoning felt, especially in the evening.
- Storage placed wherever it fits. A toy box in the dining zone and work papers on the coffee table undo the borders nightly. Storage belongs to its zone, at its edge.
Frequently Asked Questions
How do I divide an open-plan living room without walls?
Mark each zone three ways: a rug or grouped flooring under it, a low border such as a sofa back or open shelf at its edge, and its own light source. Those three signals together are enough for the eye to read one big space as several calm places, with clear walkways of about 90 cm running between the zones.
How many zones should an open-plan room have?
Usually two or three: living, dining, and sometimes a small work or reading corner. Let the count follow the activities the household actually does daily — a zone for an activity that happens monthly will collapse into storage and drag the plan’s tidiness down with it.
Where should the dining zone go in an open-plan layout?
Nearest the kitchen, always. Serving and clearing should cross metres, not the living zone. The dining group then acts as a natural buffer between the kitchen and the seating, and its pendant light marks the zone from above.
Can zoning work in a small open-plan flat?
Yes — it matters even more there. Use the smallest honest versions: one rug for the living group, the sofa’s back as the only border, and two lamp pools instead of built furniture borders. Keep to two zones and protect the single clear walkway between them.
The Bottom Line
An open-plan room looks messy when it is one undefined space with furniture floating in it. Give it a plan instead: two or three zones placed by the fixed points, each marked by its rug, its low furniture-back border and its own pool of light, with clear paths between them and storage that lives where the activity does. The room keeps its openness — and finally gains the edges that make openness feel calm instead of chaotic.